
Blog
Best Hydroponic System for Beginners
The best hydroponic system for beginners is about managing data. While systems like Deep Water Culture are simple and effective, success depends on monitoring key


In this tutorial we will show you how to easily connect an Atlas Scientific EZO-pH™ Circuit to a Raspberry Pi. There are multiple ways to connect Atlas Scientific sensors to your device of choice. In previous posts we have shown how to wire our EZO™ sensors directly into an Arduino and/or a Raspberry Pi. This time, however, we’ll be using our Gen 2 Electrically Isolated USB EZO™ Carrier Board connected to an Raspberry Pi 3.0 B+ , running our Atlas IoT Monitoring Software
Convert your Raspberry Pi into a professional water monitoring system. Atlas IoT™ uses the Raspberry Pi to create a powerful new monitoring system. Mount this to your fish tank, pool, pond, hydroponics, etc… to add a whole new understanding of your water quality. With a nice clear touchscreen, you can easily access all your sensors data, and know in real time what’s happening.
Before we begin have the following items readily available

There are two different ways to install our IoT Monitoring Software, However, we are going to use the Image file method, which has the Raspberry Pi OS and Atlas IoT already installed and ready to go, once its fully mounted onto a SD card.
So, let’s start by downloading the Atlas IoT Software – Image file, by clicking HERE. Once the image file has finished downloading, extract the file. Next, we’ll need to mount the image onto a Micro SD card, using a program called Win32 Disk Imager
(This program is for PC only, if you are following along on a MAC you can use a program called Raspberry Pi Imager*
*Atlas Scientific has not tested this software, this is what is recommended by the Raspberry Pi community
Now that the Disk Imager software is installed, lets mount the IoT Image file to our SD card.
Begin by inserting the Micro SD card into your card reader of choice and connect that to your PC, then launch the program. Click on the blue folder icon, locate, and select the extracted AtlasIoT.img file. Then click on the “Write” button to begin mounting the image.

The mounting process should take ~12 mins (depending on the Micro SD card used)
Now that the AtlasIoT.img has been successfully mounted onto the Micro SD card, remove it from card reader and insert it into the Raspberry Pi.

Using the HDMI cable, connect the monitor of your choice to the Raspberry Pi. Next, connect the USB power supply and mouse to the Pi. If you haven’t already, attach the 4 standoffs (legs) to the Gen 2 Electrically Isolated USB EZO™ Carrier Board, and then attach the Micro USB cable into both, the Carrier board and Pi.

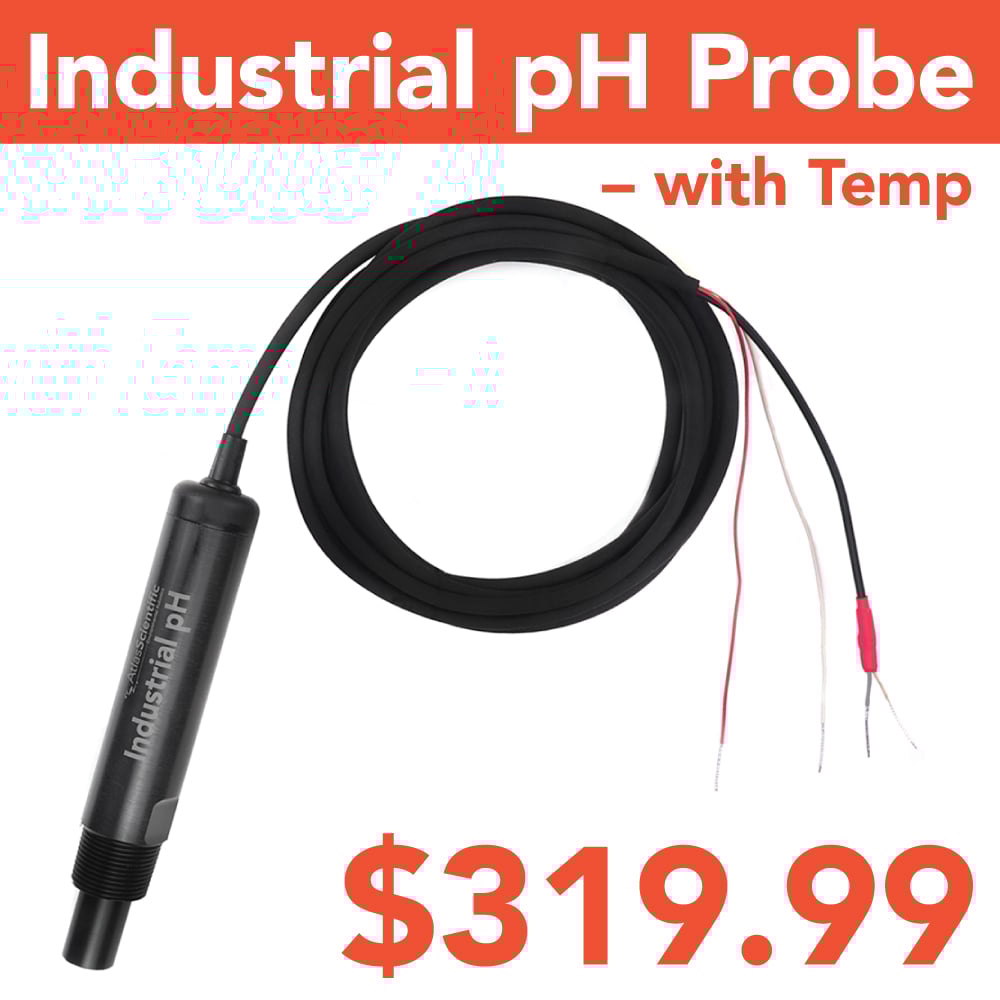
Onto the next step. With the EZO-pH™ Circuit in UART mode, insert it into the carrier board.

In order for the Raspberry Pi to detect the EZO-pH™ Circuit via USB, the circuit must be in UART mode. By default, all our EZO devices are in UART mode. You can easily tell what mode the circuit is in by looking at the LED on the circuit. If the LED is blinking green you are in UART mode. If its solid blue you are in I2C mode.

If your pH circuit is in I2C mode, don’t worry, it can be switched from UART mode to I2C mode easily. Refer to the EZO-pH™ Circuit datasheet on how to manually switch to UART mode.
And finally, connect the Consumer grade pH probe to the SMA connector on the carrier board
Now that everything is properly connected, boot up the Raspberry Pi, and monitor. The Pi will run through an initial setup and may reboot a few times in the process. This only happens during the 1st time it boots up. Once the Pi OS has finished loading, it will automatically load the Atlas IoT Monitoring Software. From here we can see the live readings from the EZO-pH™ Circuit.
Once The Atlas IoT Monitoring Software has loaded you should see a black screen with and a small red rectangle with pH readings. Using your attached USB mouse click on the red rectangle, to open the pH Screen of the software. The readings will now be displayed in the full-sized screen on the monitor
You should see a pH reading of around ~4 which is the value of the storage solution within the soaker bottle Let’s take this one step further and calibrate the probe to improve accuracy. To being the calibration process, click on the gear icon, located at the bottom left of the screen.
It’s important to note that pH probe calibration is normally done using the three-point calibration method – (Mid point, Low point and High point). The first calibration point must always be the Mid Point (pH 7.00)

If you are using pH calibration solution bottles, pour out a small amount (enough to cover the sensing tip of the pH probe) of each solution into small cups.
If you are using the pH calibration pouches, just insert the probe directly into the open pouches.
To prevent cross contamination between solutions, it is wise to have a glass of water on hand to rinse off the probe before and after each calibration point.
Let’s start by removing the soaker bottle from the pH probe. Then, place the probe in water and give it a good stir, to rinse off the storage solution.
Place the pH probe into the pH 7.00 solution, give it a stir, and let it sit in the solution for ~ 1 min. Once the readings have stabilized (not much movement from one reading to the next) click on “Calibrate pH 7.00” button within the software.

Give the probe a good rinse, in the water and then place the probe in the pH 4.00 solution. Again, give it a stir, and let it sit until the readings stabilize… once ready, click on the “Calibrate pH 4.00” button.
Repeat this process one last time, using the pH 10.00 solution. Calibration complete!
Your probe is now fully calibrated, and you can begin taking accurate readings of your own.


The best hydroponic system for beginners is about managing data. While systems like Deep Water Culture are simple and effective, success depends on monitoring key

Hydroponic water temperature controls plant health by directly affecting dissolved oxygen levels, nutrient uptake, enzyme activity, and pathogen growth. Scientifically, temperatures between 65–72°F (18–22°C) optimize